We've had goats for about four months now, we got them in May. As I've told you before, there are a lot of myths surrounding goats, particularly goat milk.
Here's how we milk our goats:
First, prepare your goat milking equipment. We do a homemade udder wash/teat dip that has to be made fresh for each milking. We use two 1/2 paper towels to clean and a small dixie cup to dip. Also in our basket is a goat brush and a hobble.
Our goats are pastured with our flerd and are moved every day to fresh grass. That means that everyday I go to where the flerd is to fetch the lovely Suzanne.
Suzanne always comes to the corner. She loves to milk!
Even though we have three goats, we only milk Suzanne. Why? Scarlet is dry (not giving milk right now) and Rosie is very busy caring for her twin boys. We will pen them at night at some point and milk her just in the mornings, but that hasn't happened yet.
We snap on a leash and head for the milk stand.
Once on the milk stand, she's ready to eat.
Because our goats are exclusively grass fed, they receive a portion of alfalfa pellets while they are milked. As quick as Suzanne milks, she eats less than a cup at a milking.
Then we move to the business end of the goat. I brush my hands down her flanks for two reasons: to let her know I'm back there and to brush off any loose hair, grass, etc. so that it doesn't fall in the milk.
I take one of the 1/2 paper towels and wet it in the udder wash/teat dip solution.
And I thoroughly wash her udder and teats. You can be a bit vigorous as this action helps to stimulate her to let down her milk.
Our goats are extremely clean. If I were to need to wash her more than one paper towels worth, I would have to use a new paper towel. Once you put a paper towel in the udder wash, you can't put it back in again.
Then we dry, also very thoroughly. As the saying goes, "Germs can't walk, but they can swim!" We want her to be very dry before we begin to milk.
Next we strip one squirt from each of her teats to clear the milk canals of any residual bacteria. This milk does NOT go into the milk pail.
After all of that, now we can get down to business...actually milking the goat!
I milk from the rear, kind of a European style. Most Americans milk from the side. I find that awkward for two reasons. First, Nubian goats are a large breed and I'm no small breeder so room on the milk stand is at a premium. Second, I don't have to bend or reach awkwardly to milk.
I've never, ever had a goat pee or poop on me or the milk pail. None of our goats are kick-y, so the bucket is safe at the rear. (Actually, when I start to milk, Suzanne will step her legs outward and the pail fits right under her udder.) If we did have a kick-y goat, we would use the hobble.
See how full her udder is? You'll want to remember that image to compare later.
The actual milking technique is quite different from the stripping motion of cow milking. The best way I can describe it is a rolling of the fingers into a fist.
Squeeze the top of the teat between your thumb and forefinger...
Then squeeze your middle finger...
Then the fourth finger...
And finally, your pinkie finger.
Repeat. Repeat. Repeat.
Some people recommend alternating your right and left hands. Others milk them at the same time. It depends on you and your goat's preference. I do both in the span of a milking. I start with alternating and then as she begins to slow down, I'll go to "power milking" with both hands at the same time.
You'll keep milking until the udder is flaccid and no more milk comes from the teats.
See the difference?
There will be some foam on top, but that's about 1.3 quarts!
We cover our milk right away to prevent anything falling in.
Now we take our little cup and fill it with the udder wash/teat dip.
We dip each teat completely in the cup. Why do we do this? The milk canals in the teat are open to release the milk. Those canals will remain open for about 30 minutes after milking and we want to prevent bacteria from moving up the canals and into her udder.
Once in the house, we strain the milk immediately through a stainless steel and paper filter.
Into quart jars, I prefer wide-mouthed.
Delicious creamy goodness!
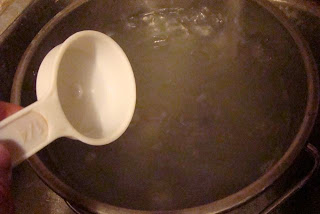
Then it's time to sanitize.
It takes me longer to sanitize from milking than to actually milk!
But I'm absolutely strict about proper sanitation when it comes to milk.
We use plastic lids on the jars of milk to prevent any off-flavors from metal rings and lids.
Cool your milk immediately. We want that milk to taste fresh and delicious!


No comments:
Post a Comment
I read each and every comment, thank you for sharing in our farm!